If you’ve recently bought an indoor rowing machine, congratulations! You are at the start of a fun-filled journey into the fitness world.
Perhaps you’re thinking about taking some of the indoor rowing classes at your local gym but are afraid that you’ll look or feel out of place. And what are these strange words you keep hearing such as split time and SPM?
If any of the above is true, then this article is for you! My name is Petra Amara, and I’ve been rowing on the water almost since I was born. Lately, however, I’ve been doing lots of workouts on my rowing machine(s) (Yes, I have more than one!).
I remember when rowing machine classes were extremely rare and finding a gym with a rowing machine was like the proverbial needle in a haystack.
Things have really changed in the past 5 years, and now it seems like everyone wants to get on the erg (yeah, we’ll get to ‘what an erg is’ in a bit).
Today, I want to offer newbies some of my top tips along with a workout plan or two just for beginners.
People of all ages can start rowing (with your doctor’s permission, of course) and reaping all the benefits of indoor rowing, even if you’ve never sat on a rowing machine before.
First- Some Basic Rowing Machine Terminology
While learning to use a rowing machine is not as difficult as one may think, you’ll have an easier time if you know a little bit of the terminology. Nothing makes you feel more comfortable than knowing what people (or the instructor) are talking about!
- The Erg– Technically, an indoor rowing machine uses a device called ergometer (or simply, the erg) to measure your speed, distance, and other data. However, you may hear people refer to their machine as “the erg” or “their erg” as if it were a person. Don’t be surprised to hear someone say that they beat the erg (meaning they beat their previous record) or that they need to spend more time with the erg.
- The Performance Monitor– Frequently called a PM, this is similar to the Erg. The PM is the device you look at that both displays and stores your data. Some rowing machine models, like Concept 2, use numbers to tell you what style of monitor you are using (a PM5, for example) while other models have really large touchscreen tablets. Whether it’s big or small, anyone referring to the PM means that they are talking about the monitor that displays and stores their workout data.
- Footplates– This is where you strap in your feet to do your workouts. You might also hear the word footrests.
- Split or Split Time– The standard measure of a rowing distance is 1,000 meters. Your split or split time is the time it takes you to row half (or split) of that, which is 500 meters. Everyone is looking to lower their split time because this means you are rowing faster.
- SPM or Strokes Per Minute– Your strokes per minute or SPM is how many strokes you are doing in one minute. Slow “paddling” would be 16-18 SPM for most people and some serious rowing would be 28 SPM.
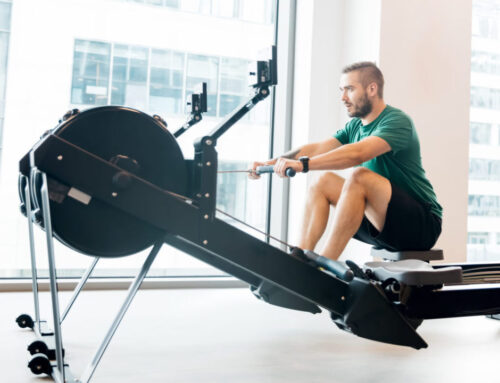
Now that you’ve learned a bit about rowing machine lingo, let’s talk about the rowing stroke.
Rowing Stroke 101
You need to start right, and in rowing, learning the proper technique is crucial to avoid hurting yourself or causing a sore lower or upper back, elbows, or hips.
If you’ve watched someone row and thought that rowing involved nothing but pulling and pushing the handlebar, you couldn’t have been more wrong.
Each rowing stroke you make has four parts or phases to it. Miss one, and you’re rowing incorrectly. Here are the different phases of rowing, with explanations as to how you properly execute each:
- The Catch– This is the starting or beginning position. Strap your feet down tightly across the widest part of your foot and hold the handle lightly. I often recommend that you let your pinkie finger hang off the edge of the handle so you don’t hold it too hard. Move close to the front of the machine and, from your hip, bend your torso forward to about the 1 o’clock position. Your arms will be directly in front of you, extended.
- The Drive– This is the part that gives your rowing machine the power. Using your legs, push off, away from the front of the machine. Straighten your torso so that it is at 12 o’clock. Your arms will still be straight in front of you. Don’t pull the handle to your chest until you get to the very end of your movement. Once your legs have fully extended. Now you can lean back just a bit to the 11 o’clock position and pull the handle to the bottom part of your bra or the midriff. The order to remember here is legs, torso, arms. Make a chant of that if it helps, “Legs, torso, arms.”
- The Finish– As the name implies, this is the finish or the end of the stroke. Bend your torso slightly backwards, working your core muscles. Your legs should be fully extended but your knees shouldn’t be locked. The handle should be sitting right underneath your bust line.
- The Recovery– This is what makes rowing bearable for beginners! You will now reverse the order you just did. Reverse your mantra and make it arms, torso, legs. Release the handle, sit upright a the 12 o’clock position, and now bend your knees and slide forward to the start (the catch) position.
This sounds complicated, but once you’ve actually sat on the erg and did the above a few times, you’ll get the hang of it really quickly.
Don’t worry about speed until you’ve mastered the strokes. It’s like riding a bike. Once you learn how to balance, you naturally pick up speed.
The same is true with the erg!
The Secret to Mastering the Correct Form
Pick drills are not only a terrific way to warm up, but they are also fantastic for teaching newbies how to row properly.
Everyone is always so excited thinking about using their new rower, but if you don’t take an hour or so to learn how to row, you’re going to end up with a sore back, to the point that you may not want to use the machine again.
The words pick drill simply means you will choose or “pick” one part of the rowing stroke and focus on doing only that part until you have mastered it!
One example of a pick drill:
Let’s say you want to practice your leg work on the Drive. In this case, you won’t even need to hold the handle.
Use your legs – Sit down and slide forward, then push back with your legs, focusing on not locking your knees and getting the feel of swinging your upper body back and forth from the 1 o’clock position in the beginning (the catch) to the 12 or 11 o’clock position.
Use a mirror to watch yourself as you move.
Focus on 12 or 11 o’clock – Why should you focus on 12 or 11 o’clock? It’s the movement of your torso in this manner that works those important core muscles. Some people find they aren’t strong enough in the beginning to lean back to the 11 o’clock setting. As you get stronger, you’ll naturally start to rock back to 11 o’clock. If you watch some videos of rowing champions, you’ll see them lean back farther than that, but for beginners, you can stay completely upright at 12 or lean back to 11 if you feel strong enough.
Where was I? Oh yes, pick drills.
If you think you’ve got the leg work and rocking motion nailed down, try using just the arms.
You can find lots of pick drills online if you want to see them in action!
Terrific Workouts for Beginners
Now that you’ve nailed the rowing stroke, you are ready to do some rowing workouts! Woo-hoo! Don’t push yourself too hard at first. Take your time and don’t be surprised if you get winded quickly.
Rowing Workout #1- The Stack!
Build your endurance with this workout so you can work up to longer workouts. Always warm up for at least 2 minutes before you get started.
- Row slowly (1 minute)
- Now row a little faster (1 minute)
- Go all out, rowing as fast as you can (1 minute)
- Relax to a slow paddle (1 minute)
Keep doing the sequence for 20 minutes or until you are worn out!
A Note About Speed
Note that I don’t mention a SPM. This is because everyone is different. A “slow” stroke for a 22-year-old will be much faster than a slow stroke rate for a 62-year-old person.
Do what feels best for you. Generally speaking, a slow stroke rate would be 16-18 SPM. A moderate pace would be 22-24 SPM. A fast pace would be about 28-30 SPM.
Rowing Workout #2- Steady, Steady, Steady
This workout seems easy, but it is harder than it sounds. It’s a real calorie burner that will increase both your heartrate and your metabolism!
- Start with a slow row (1 minute)
- Row at a comfortable pace that you think you can sustain for the next 10 minutes (around 50% of your fastest stroke rate). If you are breathing hard and sweating but can talk to someone, that’s probably a good pace.
You can increase this by 1 or 2 minutes each week until you can row for 30 or even 45 minutes nonstop!
Always remember to cool down for at least 2 minutes afterward.
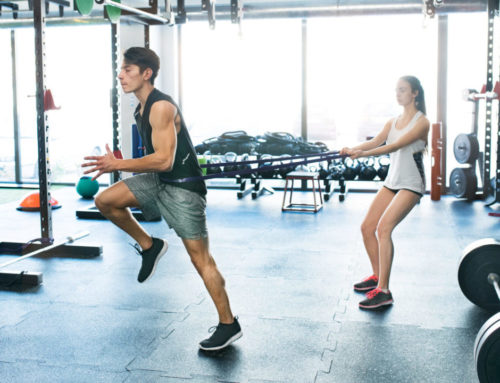
Rowing Workout #3- Jump and Row
For those who like HIIT or those who get bored doing the same thing, this workout is for you!
Put a couple of light dumbbells or resistance bands near the rower, and/or put a yoga mat on the floor close to your rower.
- After your warm-up, row for 500 meters at a moderate pace.
- Now, jump off the rower and do something different. You might try doing 10 squats or 25 burpees or maybe do a 1-minute plank. If you have weights or resistance bands, use those for the next minute or two sets of 25 lifts each- the choice is yours.
- Now get back on your erg and do 500 meters as fast as you can.
- Rest for 30 seconds.
Repeat this entire sequence 2-3 times, alternating between moderate pace and breakneck speed to burn major amounts of calories. Giving yourself that 20-30 second break period will keep you going when you think you can’t!
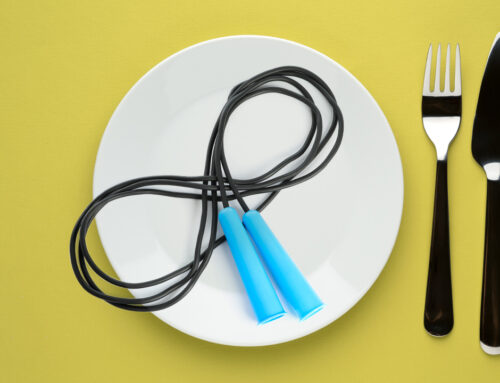
This kind of HIIT workout is the best for losing weight since it gets your heart racing, which will burn tons of calories and even continue burning long after you’ve stopped working out.
The Bottom Line
Although it isn’t new and you might not want to hear it, my absolute best piece of advice for beginners is to practice, practice, and practice.
Learning the rowing stroke and doing pick drills may not be the most interesting thing you’ve heard about rowing machine workouts, but believe me, all your efforts will pay off in the end.
Don’t be surprised to find that, if you took the time to do pick drills, you can do rowing machine workouts easily while others at the gym shake their heads and wonder how you do it.
Another piece of advice that you should never forget is to be gentle with yourself.
After all, we are human beings with real lives. We are not machines. If you want to skip a week of workouts, it’s fine. Rest but don’t quit!
Stay happy and healthy, everyone, and make rowing fun!